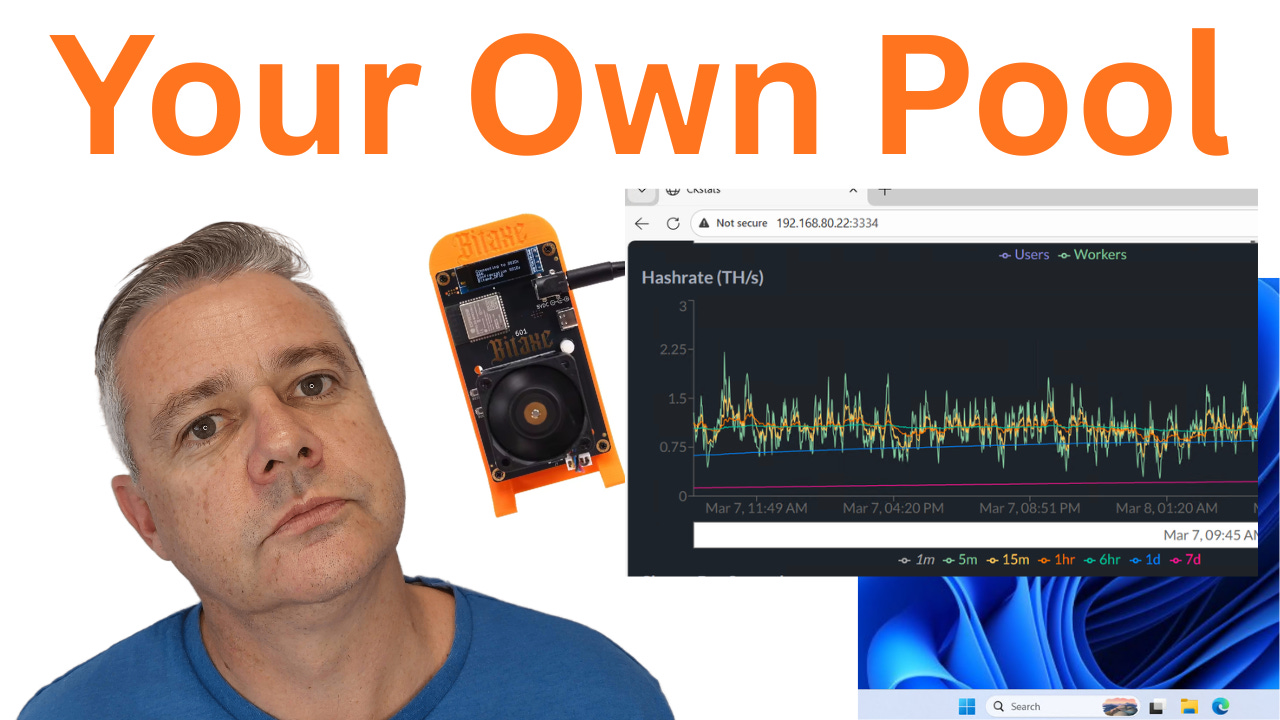
Quick start guide to solo mine Bitcoin on your own pool with ckpool on Windows in 2026
Perfect for Bitaxe owners wanting to take the next step.

You’ve noticed that all the good Bitcoin mining software runs on Linux, but you have a Windows computer. You’ve thought about buying Umbrel or Start9, but you don’t really want to spend the money.
This quick-start guide takes you through setting up your own Bitcoin solo mining pool on Windows without requiring a PhD in computer science.
We are going to do this by using a free version of Docker, Bitcoin Knots for the node software, ckpool for the Bitcoin pool software, and ckstats for the web GUI.
You can watch this YouTube video to see all the steps in this quick start guide.
https://youtu.be/MbCZpps7Ijs
Requirements
This setup will require 64GB of disk space. You’ll want an SSD, but it will run on an HDD if you are very patient.
Any CPU released in the last 10 years should be fine.
16GB of RAM would be ideal. 8GB would probably work, but it will be slow.
This guide has been created using Windows 11 Professional. I think it should work on a fully updated version of Windows 10 and on either the Home or Professional edition.
Setting up Docker
Docker Engine is free, but it is command-line only. Docker Desktop is free for personal use and has a GUI. We are going to use Docker Desktop to make things easier.
Start by downloading Docker Desktop for Windows from here:
https://www.docker.com/products/docker-desktop/
When you run the setup process, it will ask you to sign in to a Docker Desktop account. Make sure you select the option to use (and create) a “Personal” account.
Start Docker Desktop, and make sure it runs ok. If there are any issues, resolve them before continuing on. Depending on what Windows features you have installed on your computer, it might need a couple of reboots.
Preparing the Disk Environment
Now we have to go through a painful bit.
Docker Desktop installs with a virtual 1TB of disk. On your actual computer, it starts off only using a small amount of disk space, but it will grow to 1TB over time if we do nothing.
The system only needs 48GB of disk to work. We can change it to permanently use 48GB of disk before we do the full deployment, but it can be almost impossible to change later without deleting everything.
So let’s go through the pain of changing it now.
The following steps create a new 48GB disk and copy the virtual 1TB disk to it.
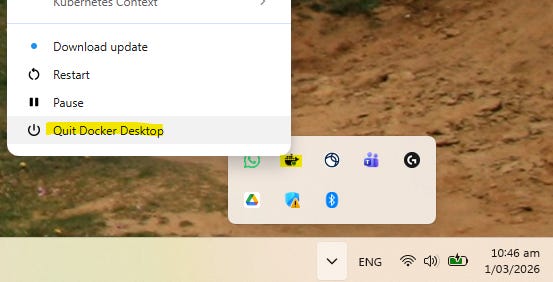
Start by quitting Docker Desktop. You need to do this by finding the Docker Desktop icon in the system tray in the bottom-right corner (it looks like a little whale), right-clicking it, and selecting “Quick Docker Desktop”. This step is critical.
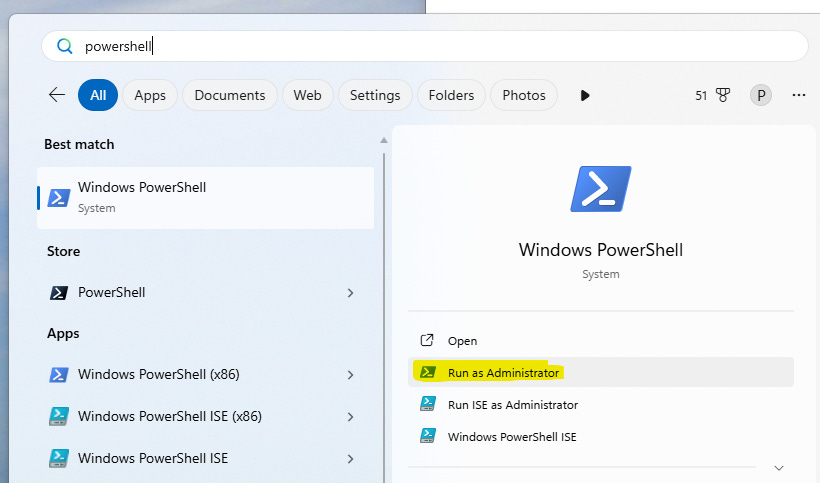
Start an Administrative PowerShell. If you click on the “Start” button, you can type in PowerShell and select the option to “Run as Administrator”.
Now we need to create a new 48GB virtual disk to store everything. Copy and paste these lines into PowerShell.
$oldPath = "$env:LOCALAPPDATA\Docker\wsl\disk\docker_data.vhdx"
$newPath = "$env:LOCALAPPDATA\Docker\wsl\disk\docker_data_new.vhdx"

New-VHD -Path $newPath -SizeBytes 48GB -Fixed
Once the new disk has finished being created, we need to shut down a Windows subsystem called WSL and mount the old 1TB disk and our new 48GB disk.
wsl --shutdown
wsl --mount --vhd $oldPath --bare
wsl --mount --vhd $newPath --bare
We are now temporarily installing Debian. We are going to delete it again shortly, so we are not going to be too fussy about it. While Debian is installing, it asks for a username and a password. I use “admin” and “admin”.
wsl --install -d DebianOnce installed, let’s check the disks we can see. You should be able to see a 1TB disk (sdd) and our new 48GB disk (sde). If they differ, you will need to adjust the commands below. They should be the same if you followed this guide from the start.
lsblkWe need to check the original 1TB disk for errors. It is normal for it to find some issues, so ignore those.
sudo e2fsck -fy /dev/sddNext, we need to shrink the filesystem on the 1TB disk to something smaller than 48GB.
sudo resize2fs /dev/sdd 16GNext we copy the old disk to our new 48GB disk.
sudo dd if=/dev/sdd of=/dev/sde bs=4M count=16GiB status=progressNow we have a 16GB filesystem on our new 48GB disk. Next, we resize the filesystem to use the whole 48GB disk.
sudo resize2fs /dev/sdeWe can now exit from Debian (back to PowerShell)
exitNow we can delete Debian and clean everything up.
wsl --shutdown
wsl --unregister debian
Now we can swap over the 1TB and 48GB disks.
Rename-Item -Path $oldPath -NewName "docker_data_OLD_BACKUP.vhdx"
Rename-Item -Path $newPath -NewName "docker_data.vhdx"
Next lets start Docker Desktop again. It is now running on our new 48GB disk.
Deploy Pool using Docker Compose
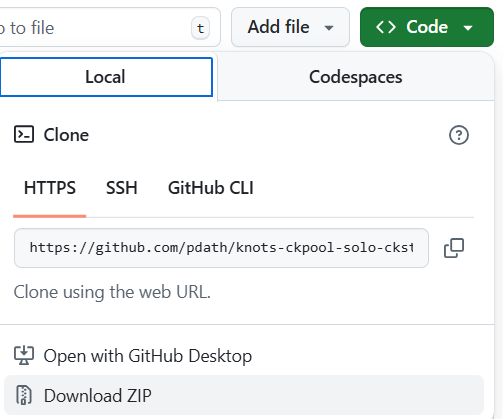
Visit this GitHub repository:
https://github.com/pdath/knots-ckpool-solo-ckstats-quick-start/tree/main
Download the repository as a zip file by clicking on the green “Code” button and then “Download Zip”.
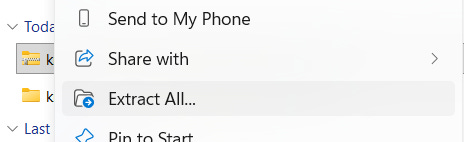
Once downloaded, extract the zip file (right click, Extract All).
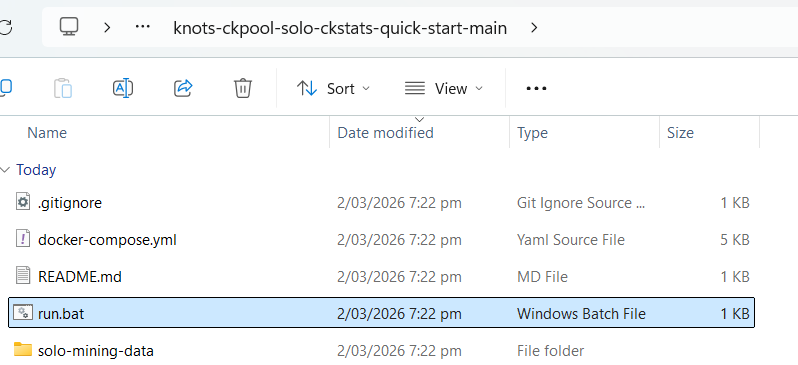
Go into the “knots-ckpool-solo-ckstats-quick-start-main” directory.
Optionally, you can go into the directory solo-mining-data\ckpool-solo-mainnet, and edit ckpool.conf to configure your own personal signature, in case you solve a block.
Once done, double-click on the “run.bat” file to provision the environment.
Now you can flick back to Docker Desktop, and you should see a bunch of containers have been created.
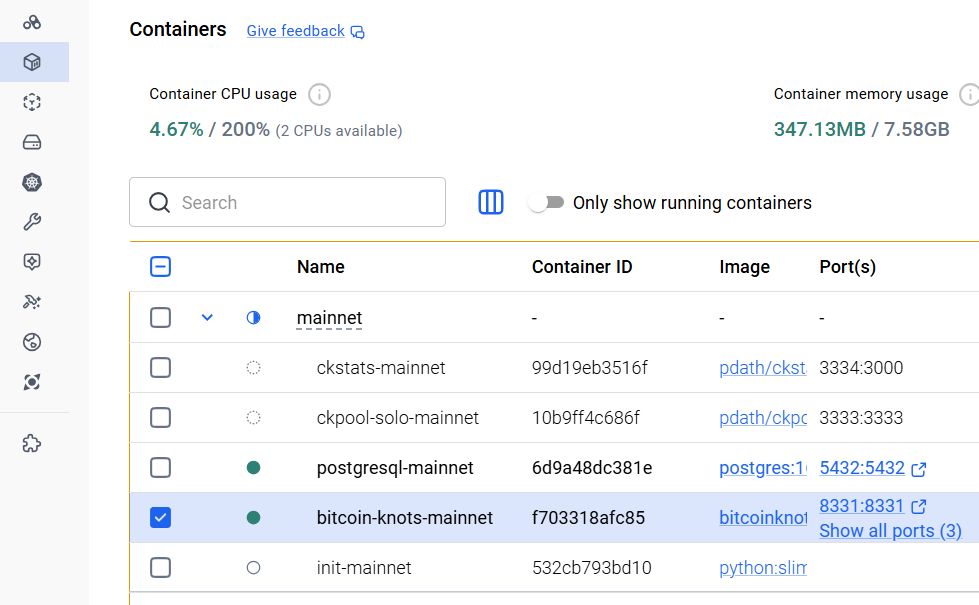
The containers are (yours might be in a different order):
ckstats-mainnet, the web gui. Note that it won’t start running until ckpool-solo-mainnet is running.
ckpool-solo-mainnet, the main mining pool. Note that it won't start running until the Bitcoin has fully synchronised. For a new setup on an NVME this can take 3 days. On an HDD, it could take 3 to 4 weeks.
postgresql-mainnet, is the database used by ckstats-mainnet.
bitcoin-knots-mainnet is the Bitcoin Node.
init-mainnet creates random passwords for all of the components the first time it runs.
If you double-click on “bitcoin-knots-mainnet”, you can watch the log. After it has been running a while, you are going to start seeing lines like this:
2026-03-03T05:51:09Z UpdateTip: ... progress=0.600883 cache=2194.9MiB(16426712txo)...The “progress” value is the percentage of the initial block download (IBD) completed. In the above, it has completed 60% of the download.
Using the Solo Pool
You can not use the pool until the Bitcoin Node has fully downloaded the blockchain. You should see “ckpool-solo-mainnet” running in Docker Desktop.
We need to find the primary IP address of your machine. Go back to the existing PowerShell session (or start a new one if you closed the last one, it does not need to be an administrative PowerShell this time). Copy and paste in this command.
(Get-NetIPConfiguration | Where-Object { $_.IPv4DefaultGateway }).IPv4Address.IPAddressGo into your ASIC (such as a BitAxe), enter the IP address for the pool (port 3333) and your wallet address in the “User” field. The wallet address can include a “.workername” on the end.
Monitoring the Solo Pool
You can monitor ckpool using ckstats. The first time ckstats runs, it has to build the environment, and this can easily take 10 minutes (be patient). You can click “ckstats-mainnet” in Docker Desktop to check whether it is still setting up. Once finished, it should be using almost no CPU.
Once it is up and running, simply point your web browser to:
http://localhost:3334/
Mine On!
You should now see your Bitcoin miner in the web GUI. Good luck solving your first solo block.